How to create a CodeFirst Entity Framework Project using Visual Studio
CodeFirst or Code First is a programming concept that has taken off in recent years. The premise behind it is that you code the project but don't worry about the database as the Entity Framework will create the tables, relationships and procedures for you. What it won't do is create necessary triggers so you will need to handle and create them yourself.
For this example, we are going to use C# and Visual Studio 2019 Community Edition. You can use any environment you like. Start Visual Studio and on the loading page, we will select Create New Project on the right hand side.


On the next screen, we're going to select Console application and use .NET Core rather than framework.


On the next screen, you're going to give it a name and a location in which to locate the files. I think its self-explanatory so no need to display a picture for this part of the process. I'm going to call mine Entity1.
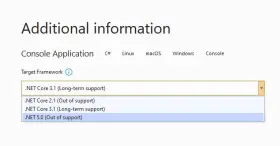
On the next screen, we're going to choose .NET Core 3.1 as its the most up to date version of .NET, the other two are no longer supported by Microsoft anymore. Once the right .NET has been chosen, click on create to create the project.


Right click on the solution, it should be Entity1 in the solution explorer if you've been following exactly the steps that I have been. In hte drop down list, you need to find Manage Nu-Get Packages, once found click on the option. The below screen which I've snipped should appear.


Make sure you have selected Browse at the top of the screen as you might mot complete the following step otherwise. Enter "Entityframework", all one word and then press enter. You need to select the option that matches the first option that is in the picture. Once selected look for the "Install" button on the right side of the screen and click it. You will be presented with a screen asking you to confirm what you are about to do, select ok and then select "User Agreement". Once installed, you can close the Nu-Get Screen. In the solution, you can expand the dependencies to see that its been installed.


Now we need to add code to the project before we can add it. If you notice the customer.cs class, that's coming later.
Tags - Entity Framework
Last Modified : June 2023